


What is Bit
BitBrowser is an anti association fingerprint browser that focuses on multi account security management. It simulates real device environments by generating independent virtual fingerprints (such as hardware parameters, IP, time zone, etc.) and supports batch operations for multiple platform accounts (such as Amazon, TikTok, Facebook, etc.).
IPFLY and Bit Agent integration
How to use IPFLY Proxy settings Bit
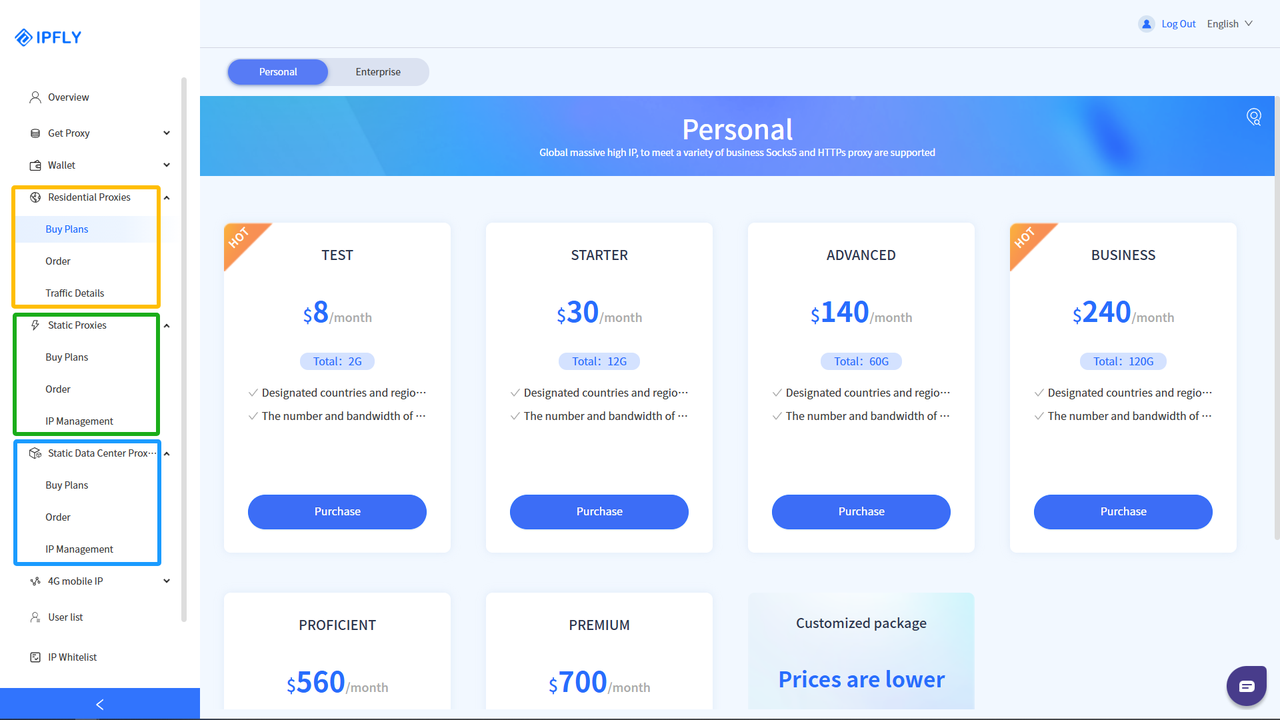
Step 1: Register/Login and Select Package
Go to the 'IPFLY official website', register an account and log in to the backend, select the 'Residential Proxies'/'Static Proxies'/'Static Data Center Proxies' service according to the proxy needs, select the country/region IP that needs to be proxied, and complete the purchase of the corresponding proxy IP package;
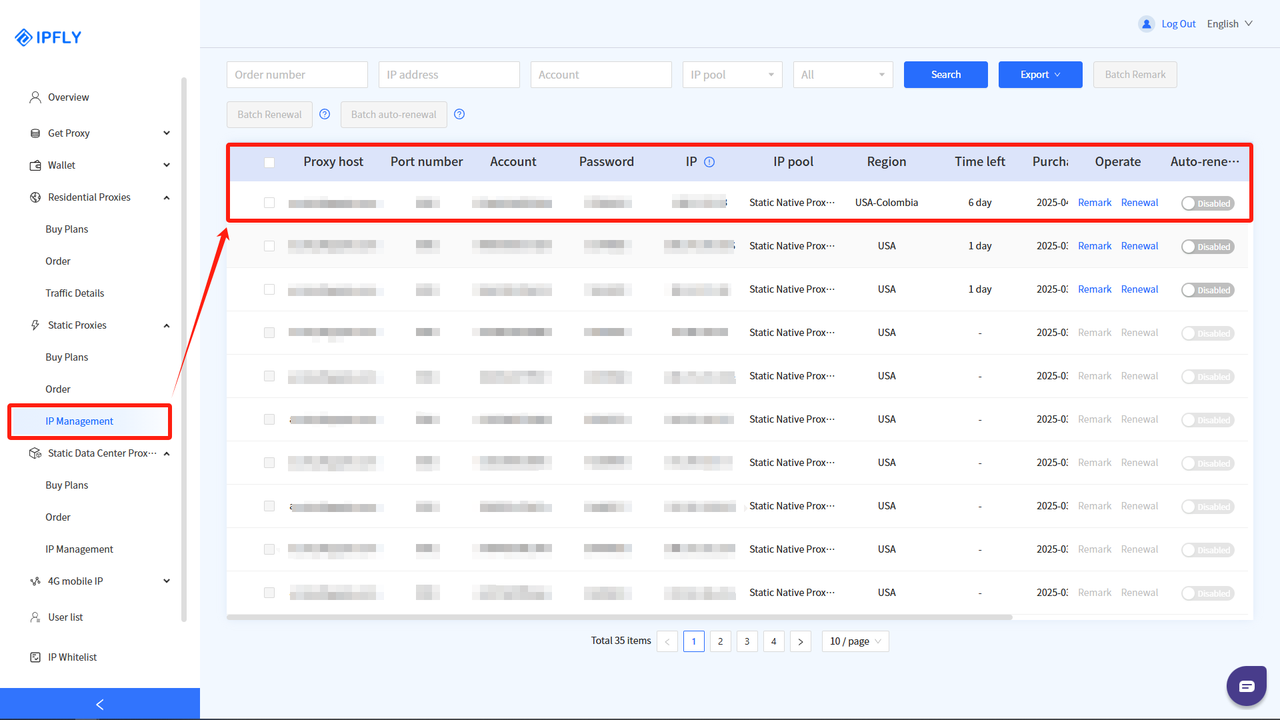
Step 2: Find and use the purchased IP node
After successfully completing the payment, you can find the purchased IP package service in the 'IP Management' of the purchased package;
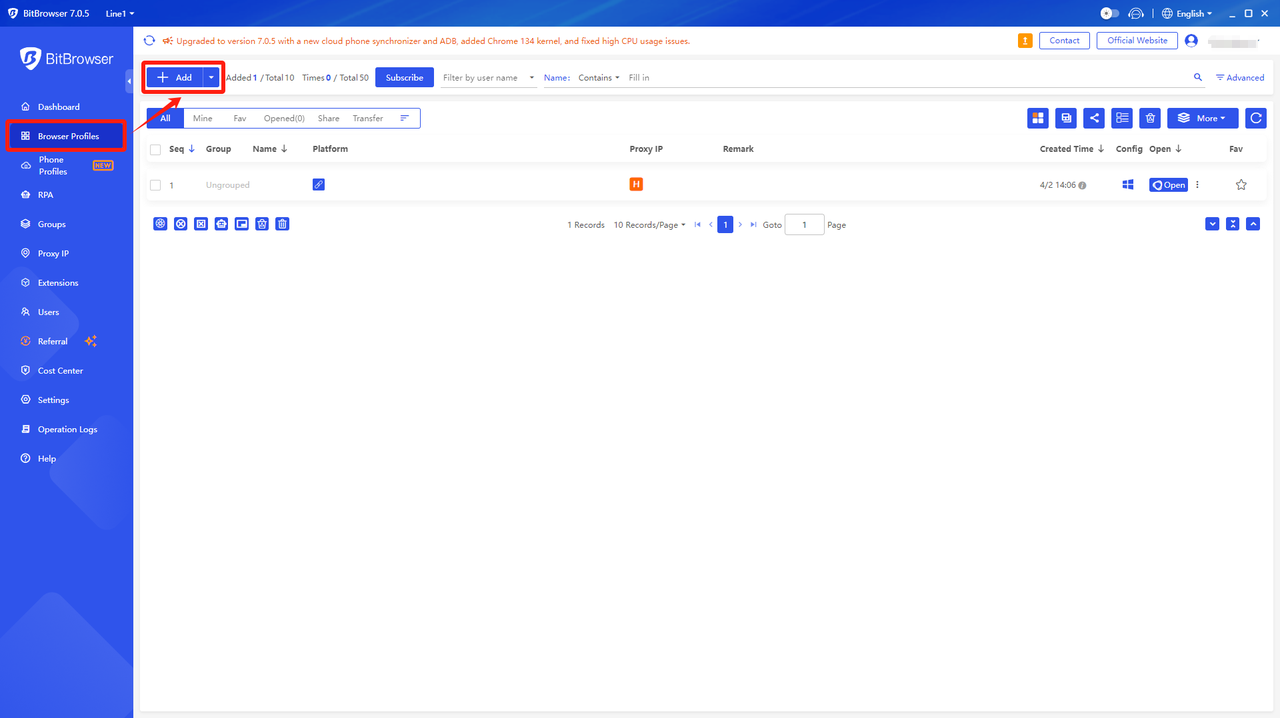
Step 3: Create a fingerprint browser window
Download and complete the registration of BitBrowser browser, log in to the backend, select 'Browser Profile', and click 'Add';
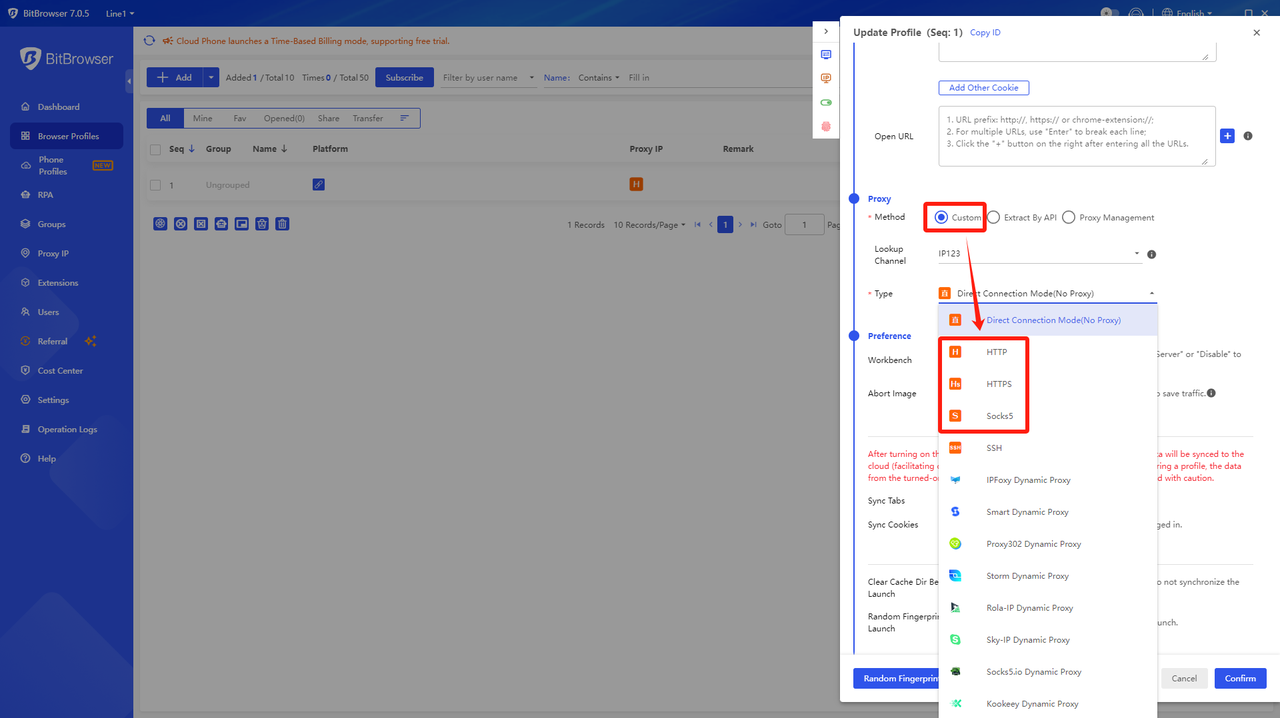
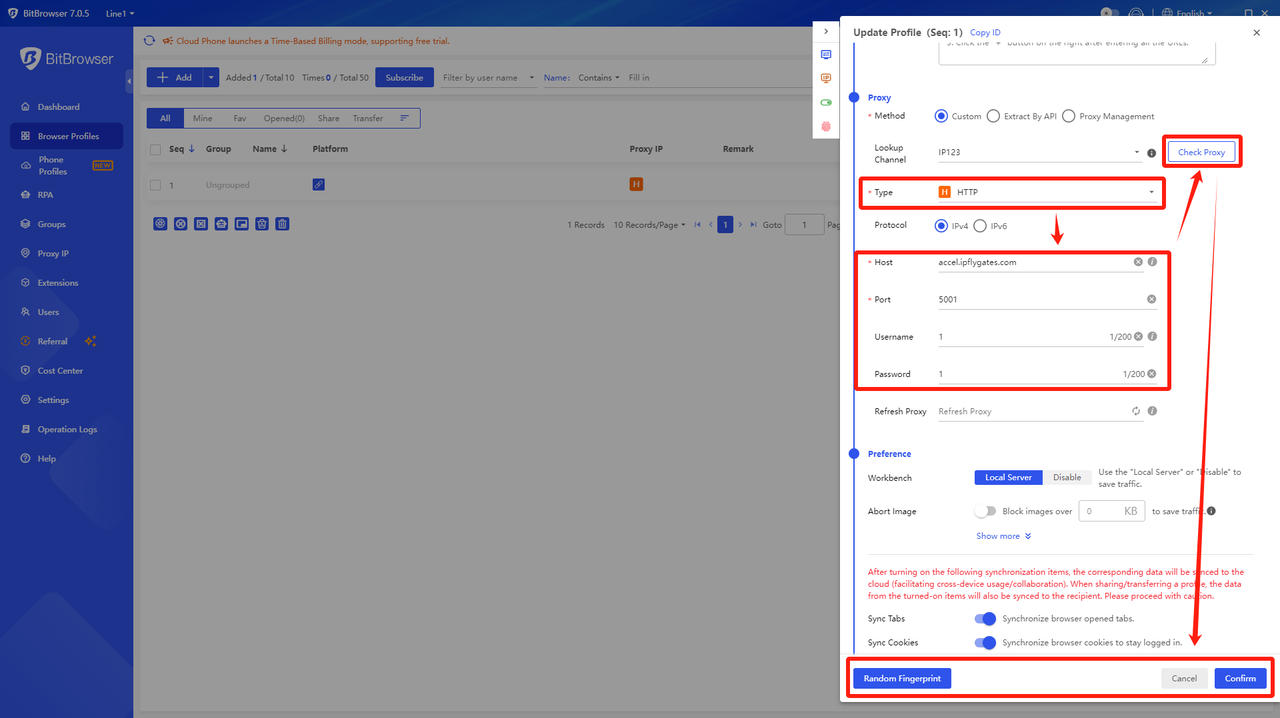
Step 4: Configure proxy settings with corresponding parameters
In the 'Proxy' category, select the proxy type: 「HTTP」/「HTTPS」/「Socks5」。
Step 5: Complete proxy configuration and verify/use proxy network environment
Set the following in 'Proxy':
「Proxy Host」: accel.ipflygates.com (fill in according to the actual package)
「Proxy Port」: 5001 (Fill in according to the actual package)
「Proxy Account」: Proxy Account
「Proxy Password」:Proxy password
Check if the proxy is working properly by clicking on 'Proxy'. If everything is normal, please click 'Confirm'.
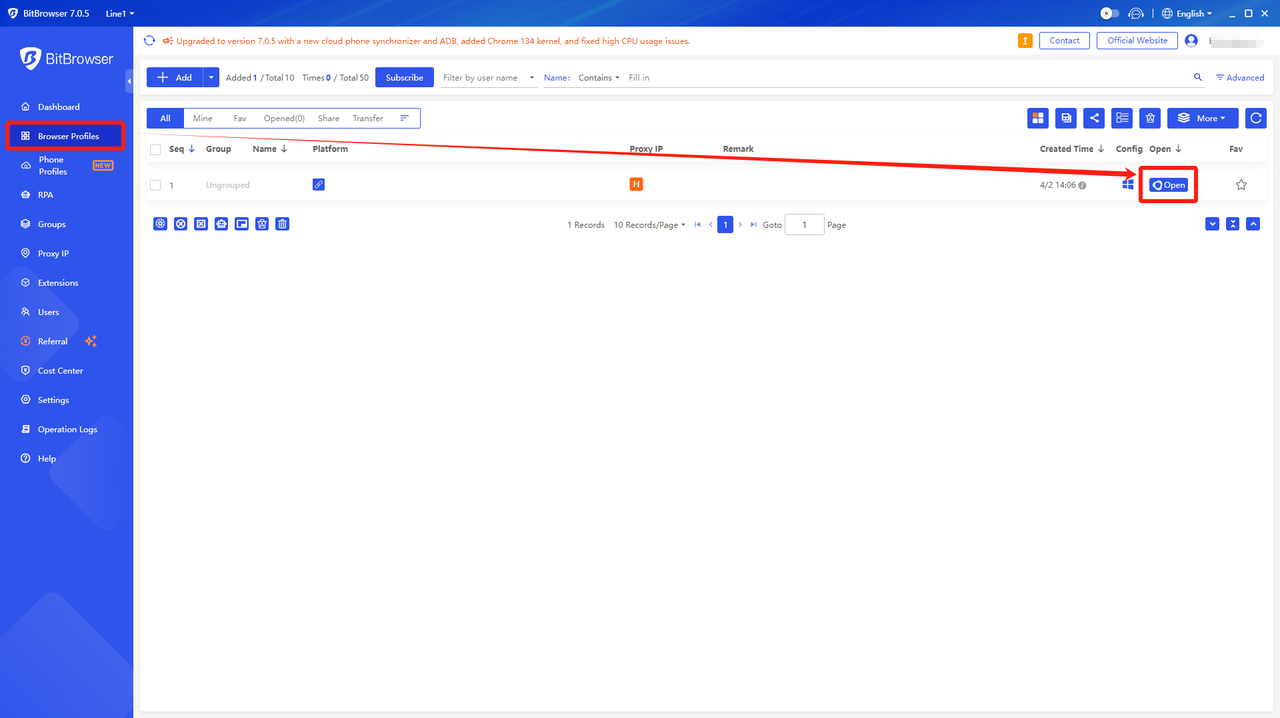
You can now launch the browser by clicking on 'Open' in 'Browser Profile'.
(Note: The above operations need to be performed in an overseas environment)