

What is Nest
NestBrowser is an anti association tool that focuses on multi account security management. It creates an independent virtual environment by customizing browser fingerprints (such as hardware parameters, IP, time zone, etc.), supports team collaboration, automated scripts, and multi platform account batch operations, effectively solving account association risks in cross-border e-commerce, social media marketing, advertising, and other scenarios
IPFLY and Nest Agent integration
How to use IPFLY Proxy settings Nest
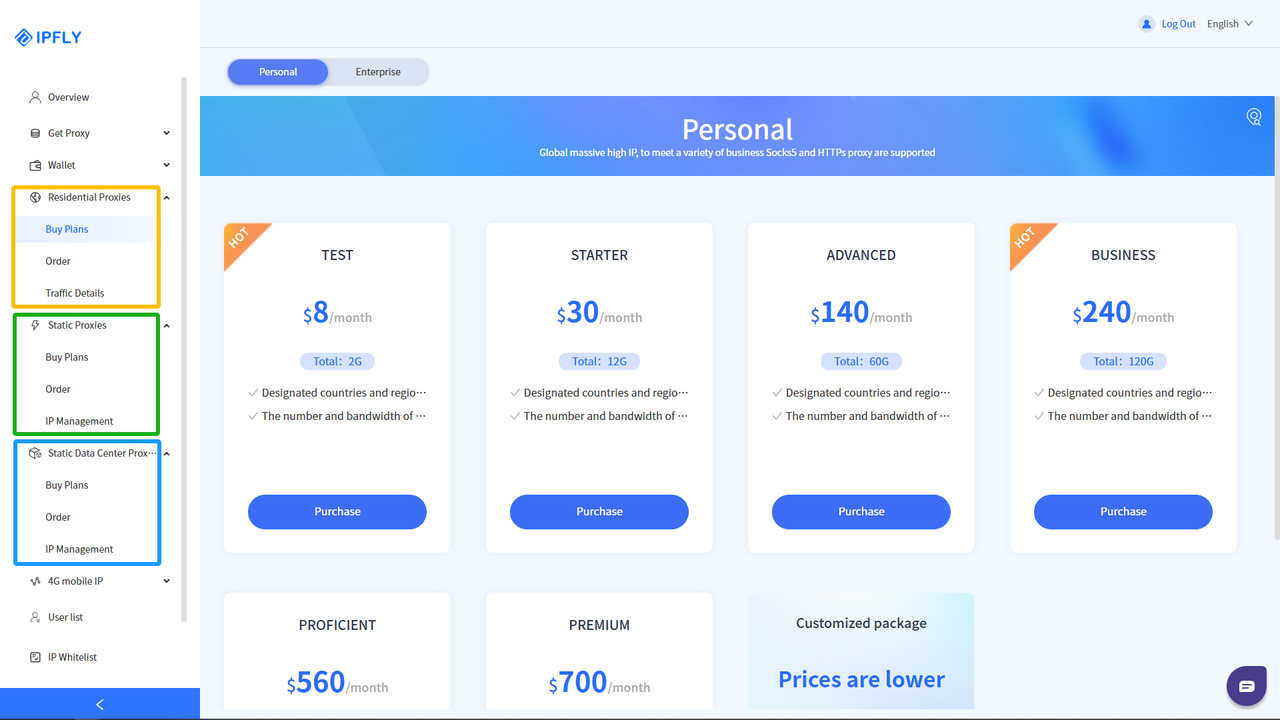
Step 1: Register/Login and Select Package
Go to the 'IPFLY official website', register an account and log in to the backend, select the 'Residential Proxies'/'Static Proxies'/'Static Data Center Proxies' service according to the proxy needs, select the country/region IP that needs to be proxied, and complete the purchase of the corresponding proxy IP package;
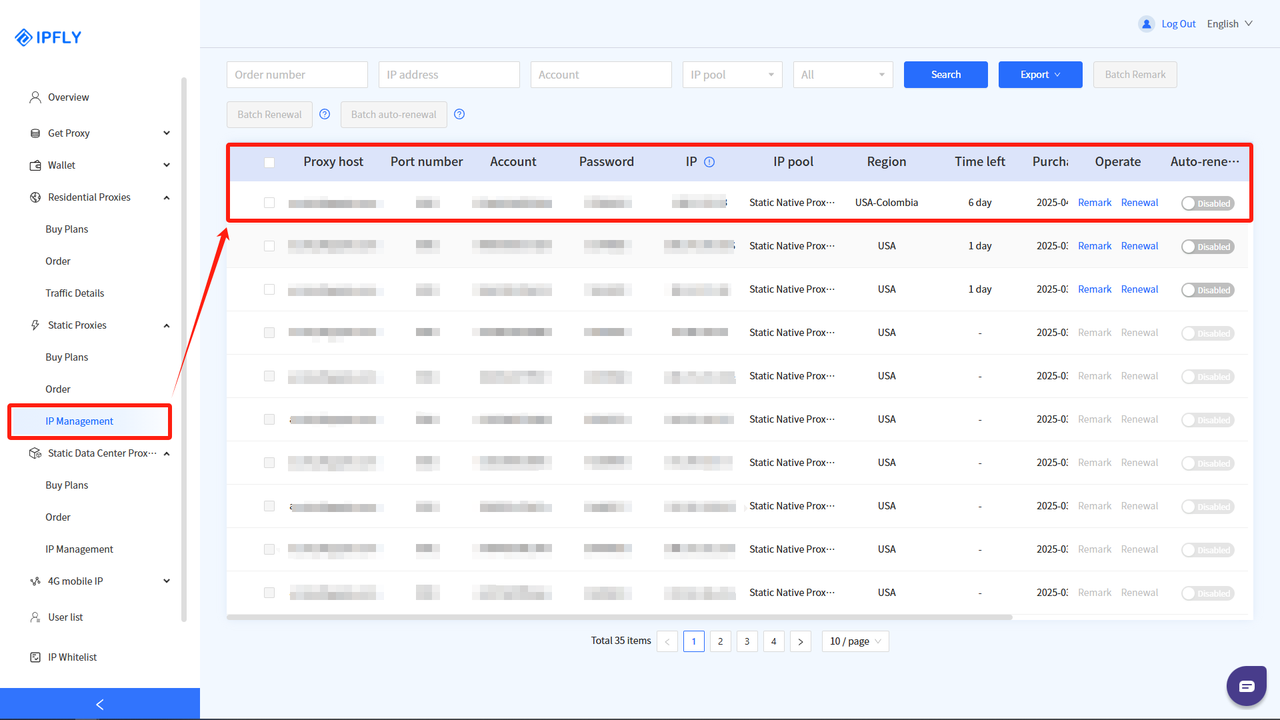
Step 2: Find and use the purchased IP node
After successfully completing the payment, you can find the purchased IP package service in the 'IP Management' of the purchased package;
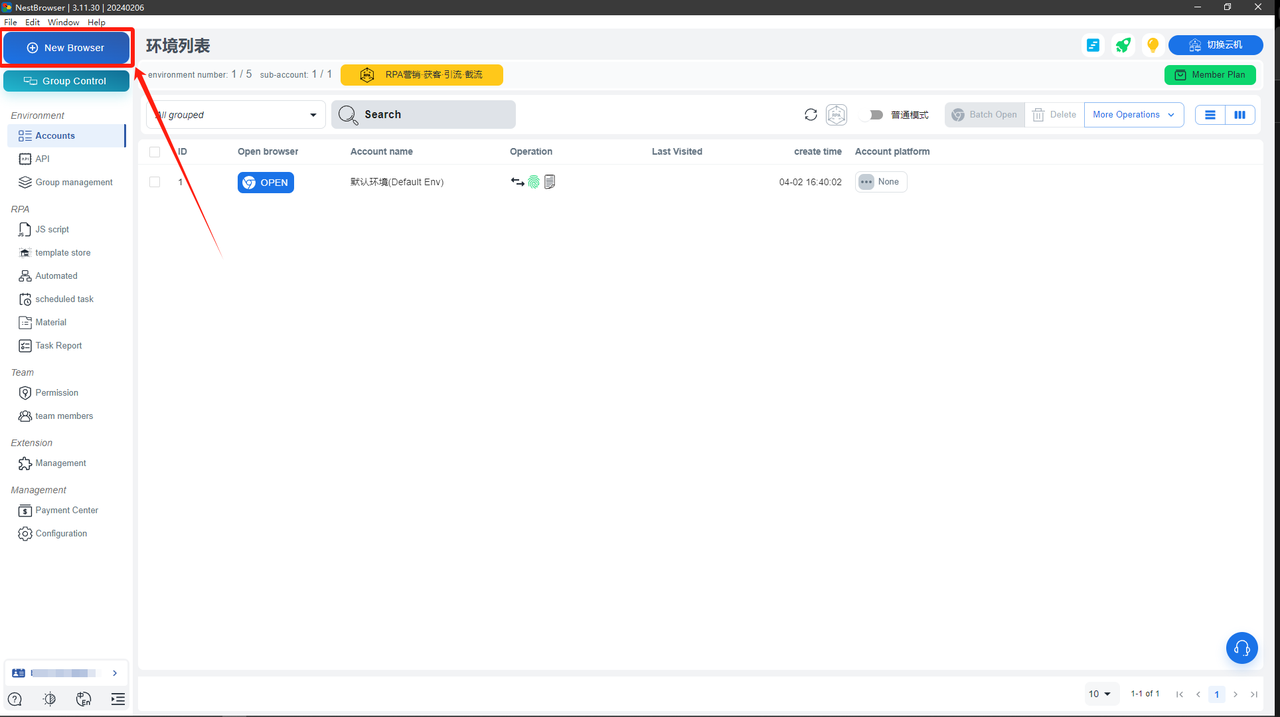
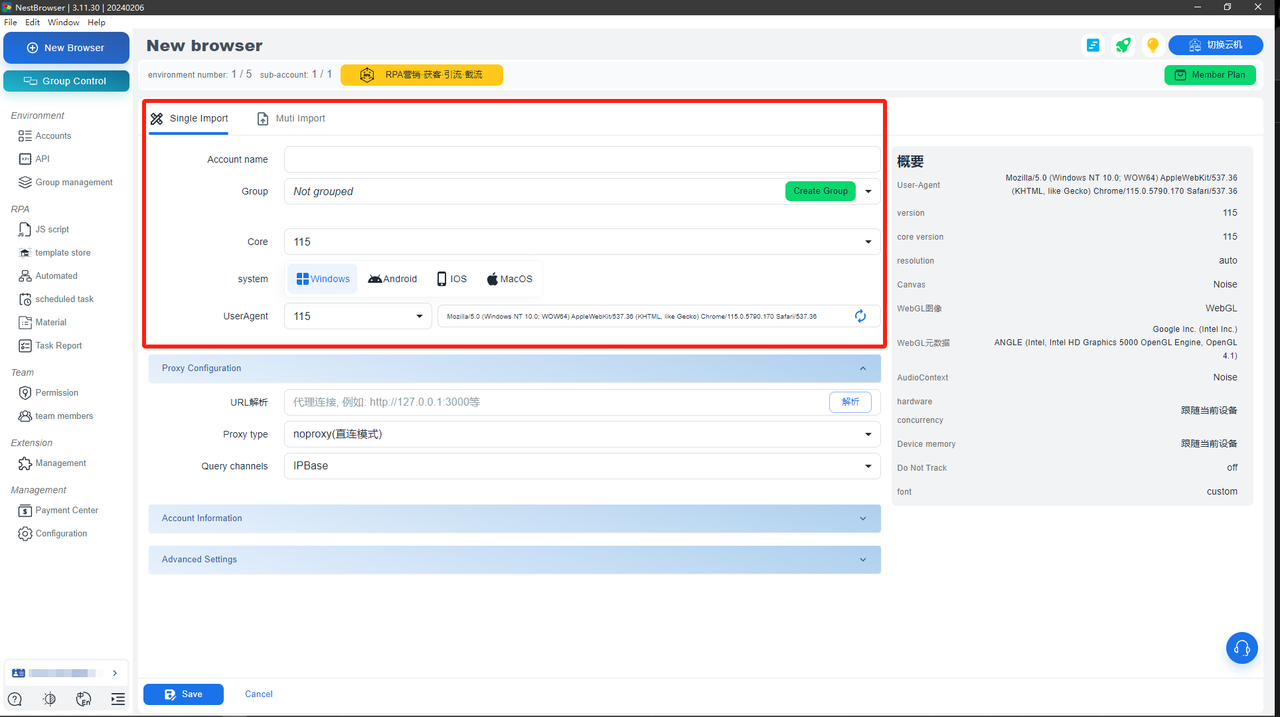
Step 3: Create a new fingerprint browser environment
Download and complete the registration of NestBrowser, log in to the backend, and click on 'New Browser';
Set fingerprint browser performance parameters according to 'single lmport';
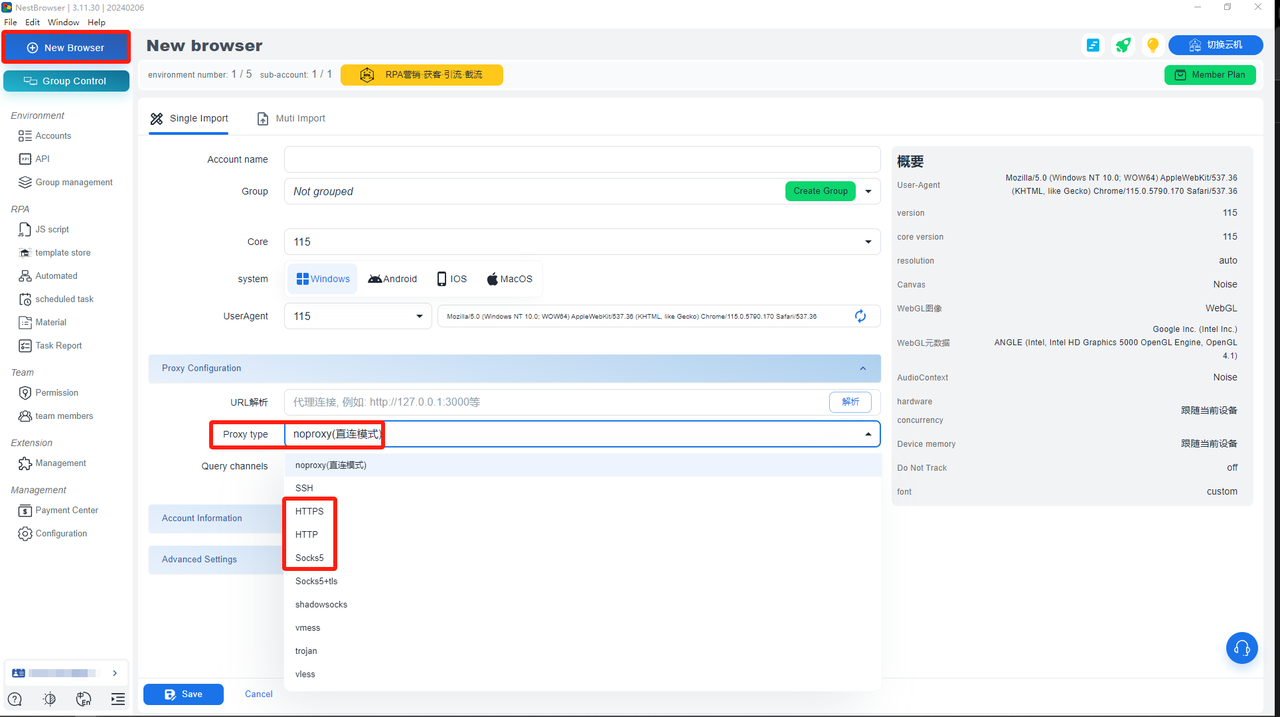
Step 4: Configure proxy parameters for proxy configuration
In the 'Proxy Configuration' category, select the proxy type: 「HTTP」/「HTTPS」/「Socks5」。
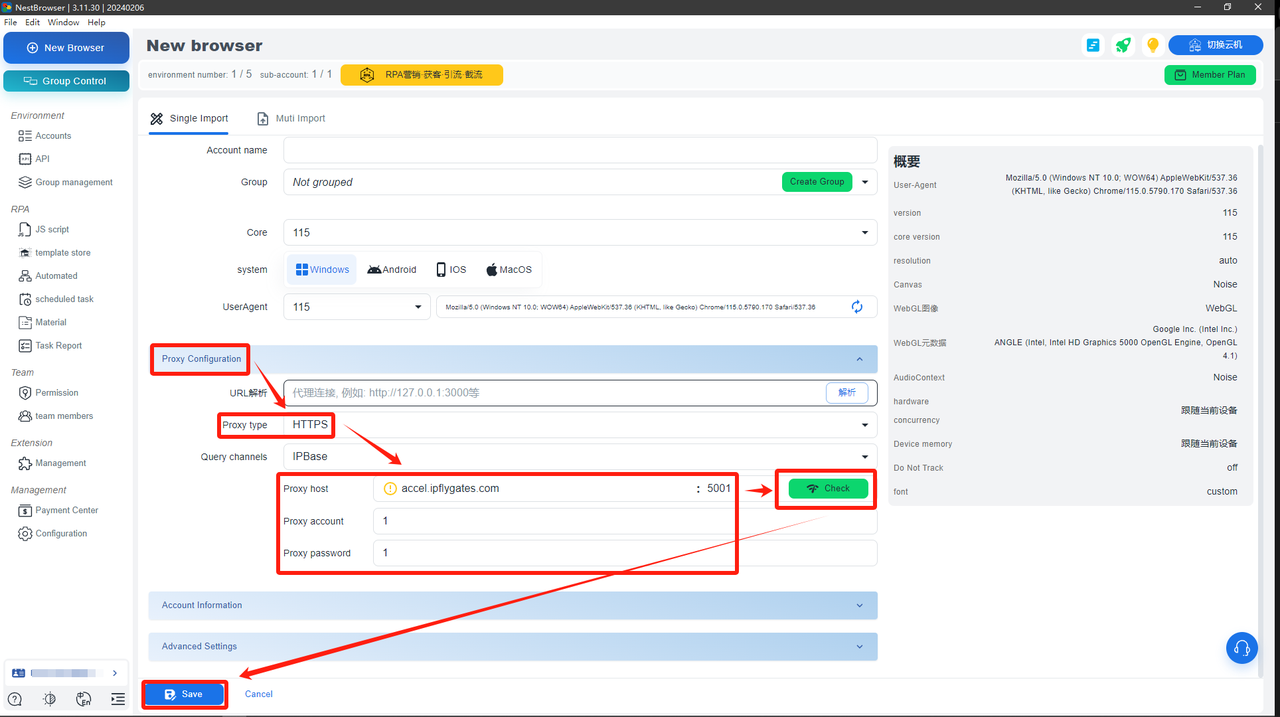
In the 'Proxy Configuration' make the following settings:
「Proxy Host」: accel.ipflygates.com (fill in according to the actual package)
「Proxy Port」: 5001 (Fill in according to the actual package)
「Proxy Account」: Proxy Account
「Proxy Password」:Proxy password
Complete the 'Account Information' and 'Advanced Settings' according to your own needs, and save them (if there are no special requirements, 'Advanced Settings' do not need to be adjusted);
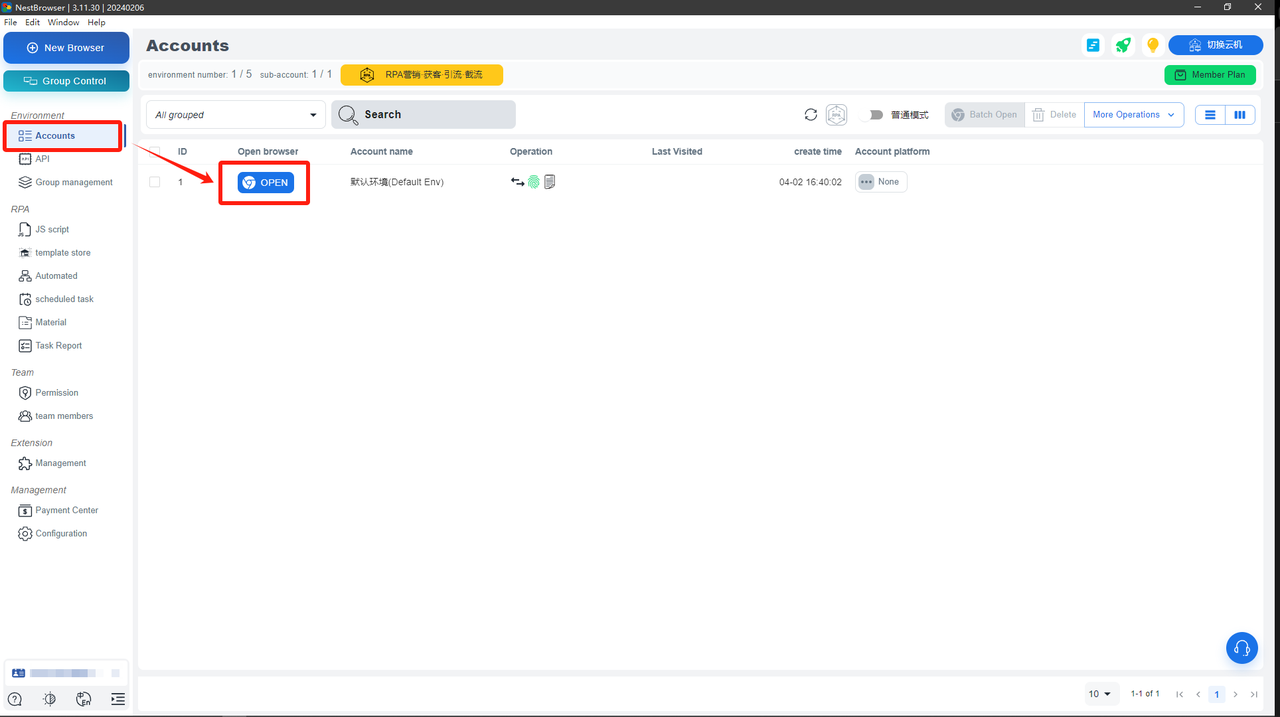
Step 5: Complete proxy configuration and verify/use proxy network environment
Open the newly established browser environment. If you have a large number of accounts to operate, please purchase the required regional IP and repeat the above steps, or select batch import when creating the environment.
(Note: The above operations need to be performed in an overseas environment)